Check Mac for Viruses is one of the important tasks that we should perform within a very short period for the sake of our device safety. Computer viruses are just like monsters that can attack our machine and damage it badly, but with little effort, we can avoid them.
Apple has integrated multiple safety elements to make Mac and other products fool-proof, but the chances remain. In our guide, we will discuss how to check Mac for viruses, and what ways should we try to get rid of them.
What is a Mac Virus?
Mac viruses commonly exist in .dmg files that Apple itself has created to install several software on Mac. It will appear with a red flag instead of the file you have downloaded. It is better to remove it quickly.
No doubt, Apple has taken a keen interest in the safety of products, and there are multiple developments for the purpose such as the M1 and M2 as the latest entries in the digital world are more secure than Intel-based models.
How to Detect Mac Viruses?
Before we dive into our main topic, we will take a view of the signs that help us to detect viruses. We take a low performance as a result of a virus, but it is not necessary, because there are some other reasons that can cause a low performance. Let’s move to some common signs of viruses;
- The addition of a new extension in the web browser
- The excessive delivery of intrusive ads.
- The Mac has frozen or unresponsive
- Very low performance
- Changing the browser homepage
- Inability to access private files
- Security alerts
- Web browser redirection
How to Check Mac for Viruses
Checking of viruses on Mac is a handy process, you can do it easily. We are going to discuss some simple but authentic ways for your ease to select and apply.
Method 1: Use Built-in Tools to Check Mac for Viruses
XProtect is the built-in technology included in Macs for detecting viruses. It uses a database of virus signatures to scan your system thoroughly. If you want to use it for scanning, you have to enable it by default.
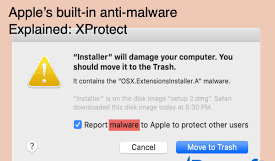
The downside of the tool is that it is limited in performance, so we can use it as a passive solution, not for entire prospects.
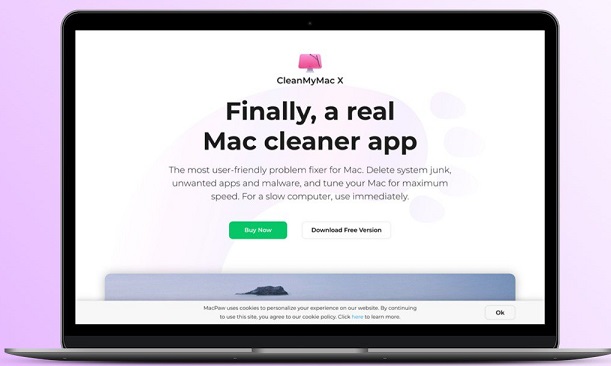
Method 2: Use CleanMyMac X to Check Mac for Viruses
CleanMyMac X is the best solution for checking viruses on Mac, as it can scan all types of viruses, malware, spyware, etc, and gives you a complete report with solutions. You can use it by following the steps;
- Launch the app on your system, and go to the main screen.
- Click on the Smart Scan option to select the Scan tile.
- Wait until the scanning process completes, and click on Mac malware scan under the Protection.
- Here you can view if any malware is detected.
- Click on the Remove option.
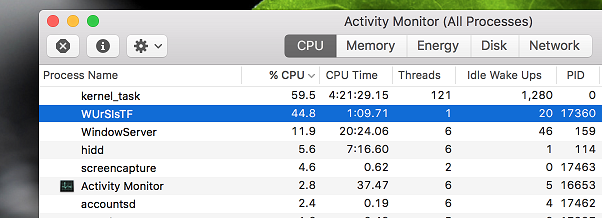
Method 3: Use Activity Monitor to Check Mac for Viruses
Activity Monitor is the place where you can check the working flow of your system. You can check if any types of viruses are available. Follow the given steps;
1. Unlock your Mac and head to the Applications option.
2. Select the Utilities tile, and click on the Activity Monitor, you can open it via the Finder app.

3. Open the Activity Monitor by double-clicking on it.
4. Click on the CPU tab, and select the ‘High to Low’ option, here you can check what programs are consuming much CPU.
5. Click ‘X ‘next to apps or programs if you remove them.
6. Repeat the process with any other suspicious program running.
6. Likewise, click on the Memory tab, go to the Process Name section, and remove any unknown process name is exists there.
Method 4: Remove Temporary Files & Downloads to Check Mac for Viruses
We know .dmg files could include Mac viruses, and they move to the Downloads folder like other programs you have downloaded. It is better to remove them. Follow the given steps;
1. Launch the Finder app, and click on the Go.
2. Search the Download folder using the Finder app.
3. Click to open the Download folder, and select the .dmg files, or another suspicious file is there.
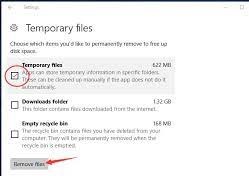
4. Click on the Delete option, and get rid of them.
Method 5: Uninstall Browser Extensions to Check Mac for Viruses
Browser extensions can also create a large suspicious material on your device. However Apple has strong restrictions about the downloading process, but in the case of using Google Chrome, you can have a mess of extensions. Simply delete them by following the given steps.
1. Open your web browser, and click on the Menu bar from the top right corner.
2. Select Extensions by clicking on the Tools field.
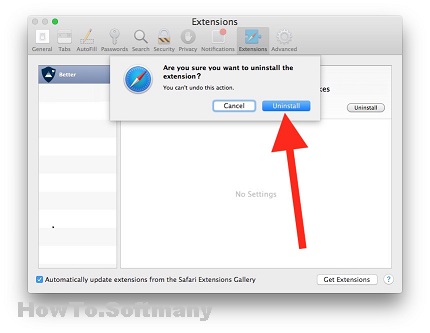
3. Check the extensions list, and remove if any of them are suspicious.
Method 6: Uninstall Suspicious Apps to Check Mac for Viruses
1. Launch the Finder App, and click on the Go option.
2. Search Applications using the Go option, or press Shift + Command + A to access the Applications.
3. Click Applications to open the installed apps list, and check if any suspicious app exists.
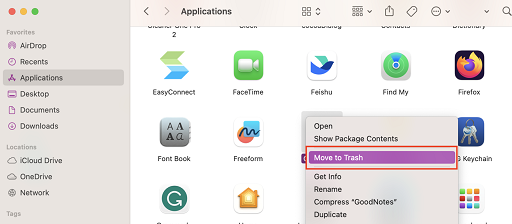
4. Click on the X next to the app, and send it to the Trash bin.
Method 7: Check Login Items
Login items are the part of startup process of your Mac. You can manually check if any types of viruses or malware exist here. Follow the given steps;
1. Open your Mac and head to the System Preferences.
2. Select the Users & Groups option.
3. Click on the Login tab, and open the list of all items.
4. Locate if any suspicious item exists, simply click on the Minus button, and remove any item from the list.
Method 8: Use Malwarebytes to check Mac for Viruses
You will find a plethora of third-party antivirus software for removing viruses from your Mac. One of them CleanMyMac X is the one of best solutions specifically for Macs. There a lot of others also. Here we will discuss another such tool, Malwarebytes. You can use it to detect viruses or malware easily. It is available with the 14-day trial version.
1. Open your web browser, and visit the official website of Malwarebytes.
2. Download and install the program for your Mac.
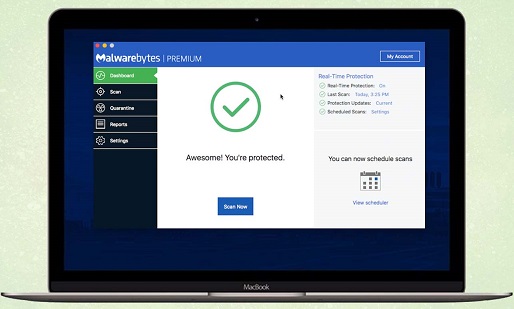
3. Launch it, and go to the main screen.
4. Click on the Scan option to run the process.
5. In case of detecting any suspicious material, you are given two options; Quarantine Selected or Deleted.
6. Simply click the option you prefer, and get rid of the viruses or malware.
Method 9: Full Disk Access
Full Disk Access is also an in-built feature of the Mac that offers a list of applications with unrestricted access to the Mac. It is the center of all system administration, so an attack of any virus or malware can create serious damage. Follow the given steps;
1. Unlock your Mac and head to the System Preferences.
2. Click on the Security & privacy tile to select the Privacy tab.
3. Click on Full Disk Access from the sidebar menu.
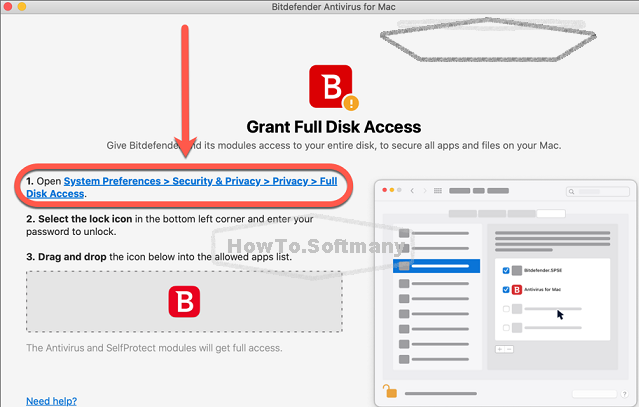
4. Now, check the list of apps access to your Mac’s disk. Click the X to remove any suspicious app is exists here.
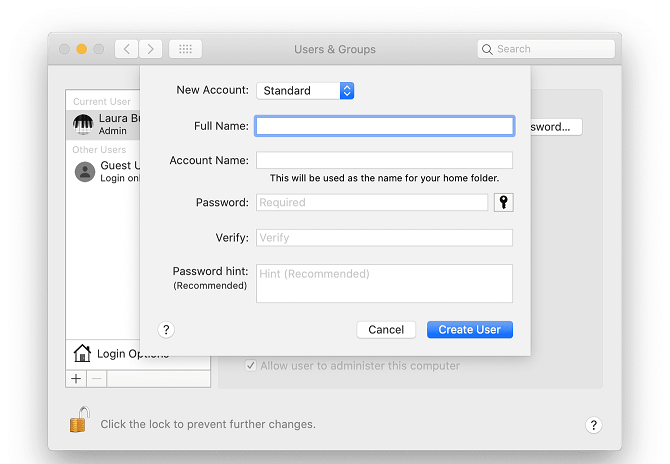
Method 10: Use a New Profile to Check Mac for Viruses
If any of the above methods helps you to fix the issue. It is better to change your ID if possible. Follow the given steps;
1. Unlock your Mac, and head to System Settings using the Apple menu.
2. Click on the Add Account option.
3. Open the profile page, and click on the Edit option.
4. Enter a new username and password.
5. Click on the Create User option.
How to Avoid Damaging of Mac via Viruses
Here are some precautions that can save your system from any type of damage via viruses
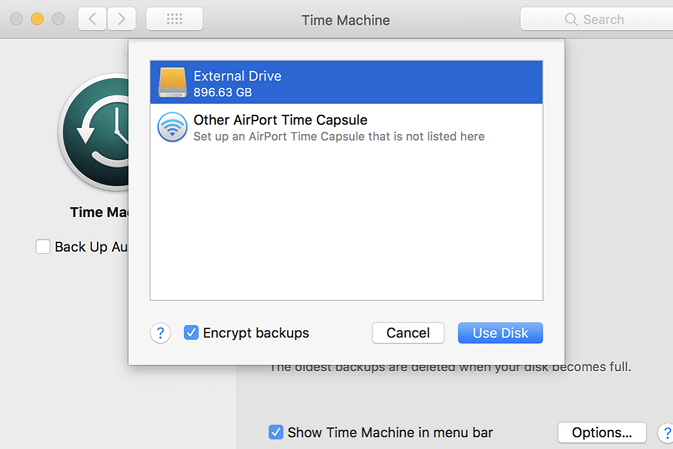
Create Backup
Apple offers Time Machine, a built-in tool for saving the backups of Macs. Here you can store all the copies of your backups to save your content from any crashing of the machine. Here is how it works;
- Unlock your Mac, and connect a portable hard drive with it.
- Click on the Apple menu to select System Settings.
- Click on the General tab and click Time Machine to open it.
- Add a Backup Disk and complete the process by following the on-screen instructions.
If you are not satisfied with Time Machine, it consumes a large storage by storing everything and offers a tedious process. You can avail of any other tool such as Get Backup Pro. Follow the given steps to store your backup;
- Launch Get Backup Pro on your Mac, and click on the Backup option.
- You can mirror your boot drive by clicking on the Clone option.
- Create a new project by clicking on the + button from the bottom of the screen.
- Select your backup source and location.
- Add your backup files by clicking the File+ option.
- Click on the Backup option to start your process.
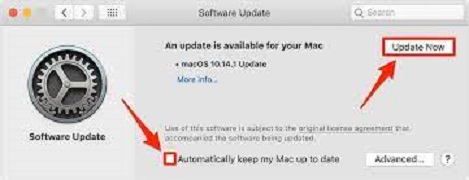
Update Software & macOS
Updating macOS to the latest version can also save you from multiple irritating issues. Follow the given steps;
- Open your Mac, and launch the App Store.
- Open System Settings using the Apple menu.
- Click on the General tab from the sidebar menu.
- Tap on the Software Update option.
- Let the Mac locate if any update is available.
- Click the ‘Update Now’ option, if any update is existed.
Use any Firewall
The use of a firewall or any other such security measure can also be a possible way of avoiding the entry of viruses to your Mac. You need to go to System Settings using the Apple menu and enable the Firewall.
Bottom Lines
So, friends, you can easily protect your Mac from attack of viruses or malware. Simply check regularly the system; if any symptoms occur in the performance or any other workflow, you need to fix it quickly. Use an authentic antivirus program, and enable an in-built program also for any quick update.
FAQs
Q: Is there any antivirus program available on Mac?
Yes, Apple launched XProtect, a built-in antivirus program that helps you to quickly detect if any virus exists on your Mac.
Q: What is the best way of scanning my Mac?
CleanMyMac X is the best option, as it is specifically designed for Mac devices. It includes multiple amazing features to scan your system thoroughly, detect viruses, and remove them automatically.